Trading
The British economist Adam Smith argued in that the economic development of a society or nation is restricted by the size of the respective market. In other words, the economy cannot develop further if the size of the market is too small.
This idea is not restricted to the real world alone.
The Black Desert is set in a fantasy world with a European Middle Age setting, and it has markets between the nations and huge markets between the continents.
This means that there is a big market with huge potential for growth.
In the economy of a game, it is very important that there is a balance between production and consumption of money. The currency used in the Black Desert is ‘Silver Coins’, and the major sources of production include drops from hunting monsters, selling miscellaneous items, or those created from exchanges. Trade also plays a major role in the production of silver coins. On the contrary, the major consumption of silver coins includes purchasing various items from the shop and the marketplace commission.
In the current economic world of the Black Desert, the production of silver coins is slightly ahead of the consumption.
As such, trade plays an important role in the economy of the game, yet it’s not something grand that requires expert knowledge or special conditions. It has been created so that anyone can earn silver coins easily, so it’s not that difficult as long as you know how to use it.
We will now take a detailed look at the trade system of the Black Desert. If you invest a moment of your time to read this guide, then you will find yourself a wealthy merchant in no time at all.
What is Trade?
In the world of Black Desert, Trade literally refers to the exchange of trade Items with trader. You can either acquire trade items from hunting, completing quests, purchasing them from a trader, or through crafting houses. The fish caught through fishing are also classified as trade items.
Unlike other items, trade items will always come with its origin and a distance bonus will be calculated based on the distance between the origin and the trader. In other words, you can earn more from selling a trade item to a trader who is further from its origin.
But just trying to sell it as far away as possible is not always the best. In order for the value of the trade item to be properly appreciated, the node of the origin and the town you’re trying to sell it to must be connected. Thus, you will need to invest in nodes and also consider the traveling time as well.
If your purpose is to do more than just trade, then it is essential to find out how you can trade most efficiently.
In order to achieve this, there are a few key words that you must understand. They are as follows.
Node Connection
The node between the origin and the place it’s being sold to must be connected. If it is not, then the trade item can only be sold for 30% of the original price.
Distance
Distance bonus is accumulated relative to the distance the trade item moves. Thus, you will receive a higher price when you sell it as far away as possible, but you must consider the time it takes to travel as well as the Contribution Points you need to use to connect the nodes.
Market Price
The market price refers to the price that the trade item is sold and purchased at. If the volume of trade items increase, the price will rise when you are buying, and fall when you’re selling. On the contrary, if the volume stays low for a set period of time, the price will decrease when you are buying and it will go up when you’re selling. If this trend continues and reaches a maximum (or minimum) point, then the market price will be stabilized by returning to the fixed price after a set period of time. In order for the market price to fluctuate from the fixed value, a moderate amount of dealings are needed.
Price Guarantee Time
This is the expiration date for a trade item. When a trade item is purchased, the price will depreciate to a maximum of 30% of the original price after 24 hours. Thus, once you purchase a trade item, you need to sell it as soon as possible. The Price Guarantee Time is only applied to items purchased from a trader and fish.
Bargain Game
It is a mini-game where you bargain with the trader.
You will consume 5 Energy but if you get successful, but you will be able to sell your trade items at an increased price. Energy is naturally recharged as you travel, so it’s always good to bargain every time you get the chance.

▲ It is always better to get the Bargain Game Bonus.
Stock
This is the maximum amount of a trade item that can be purchased from the trader at once. Generally, more expensive items will be low in stock. The stock for all items will be reset in an hour or an hour and a half.
Purchase Conditions
This is the minimum Trade Level required to purchase a certain trade item. Items that doesn’t show a purchase condition indicates you have already satisfied the purchase conditions.
Remaining Quantity
This is the maximum quantity of a trade item that can be supplied to the delivery NPC.
The Imperial Delivery is reset once every 3 hours, while the Imperial Crafting Delivery and Imperial Fishing Delivery is reset once every 3 hours at random.
Trade Event
If a trade event happens in a town, the selling price will increase to 200%. If you happen to be passing by one of these towns, don’t forget to sell your trade items and earn some money.
|
Desert Buff refers to the bonus value that is provided when you trade with a region that you can reach by going through the desert, such as Valencia Capital and Ibellab Oasis. Thus, it is applied there is a trade between a desert and a non-desert area. You will receive a 100% bonus for normal trade items, and 50% bonus for other trade items. However, remember that the Desert Buff applies only when there is a certain distance between the towns.
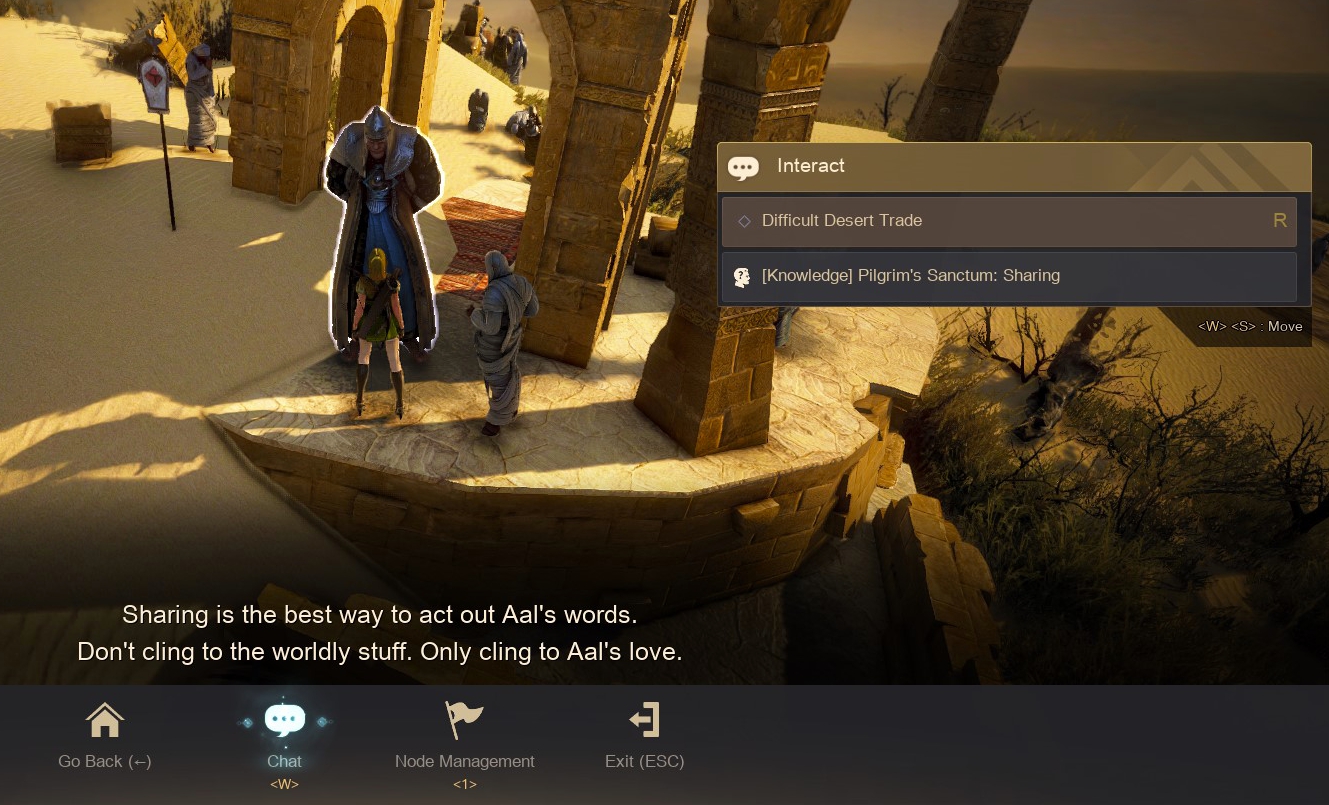
In order to receive the Desert Buff, you must become a Trade Master (Level 51).You can receive this buff by completing a quest (refer to the details below), or receive it through consuming 50 energy talking to , the node manager of Pilgrim’s Sanctum in the great desert of Valencia. The latter method requires the character to have Master Trade Lv. 2 or higher as the conversation button will not appear if this requirement is not met. The buff lasts for 1 hour.
Items that receive the Desert Buff can be easily identified as they are indicated by an icon on the sell trade item list.
# Desert Trade Buff Prerequisite Quest Players above Lv. 55 can go to Ibellab Oasis of Valencia and accept the [Peaceful Oasis] quest from NPC . This is a quest series involving 13 quests, and the last quest, [The Truth Does Not Sink] , must be completed. After having done this and when you have Master Trade Lv. 1 or higher, you can go see NPC in Sand Grain Bazaar and receive the [Shelter in the Desolate Wilderness] quest. You will be able to receive the Desert Buff through this quest series.
|
Types of Trade by Means of Transport
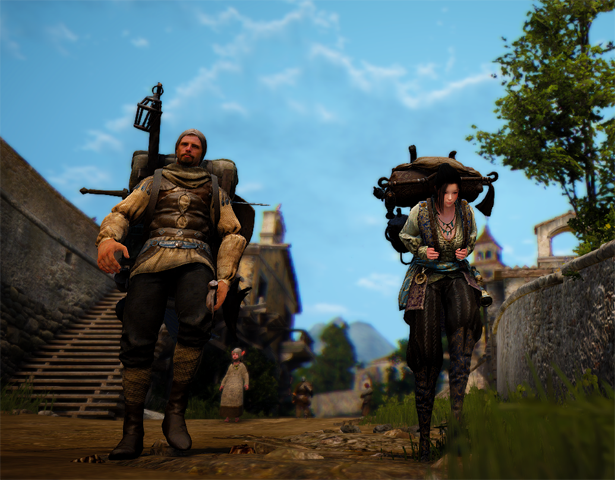
Trade by Foot
This refers to doing trade by carrying a backpack.
If you carry a backpack, it will reduce your movement speed. So the heavier it is, the slower you’ll be. Since it is difficult to properly trade because of the movement speed and the weight restrictions, just do short distance trades using this method. However, it is worth noting that doing trade with a backpack will increase the strength component of the character’s training. This is relative to the distance traveled and not the weight, so players can just purchase a single trade item and set auto-move within a safe area.
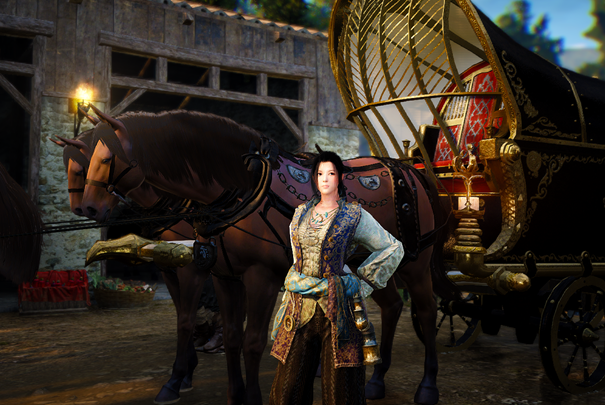
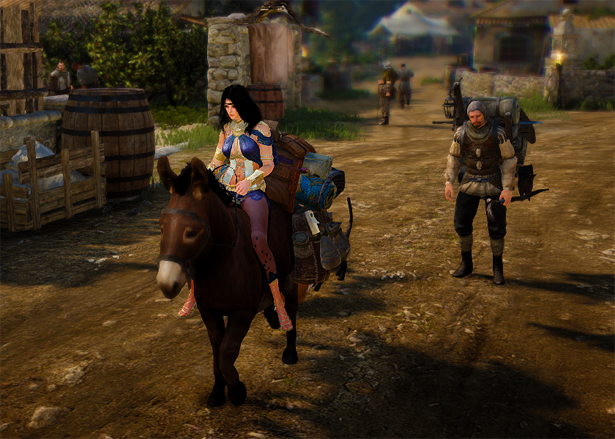
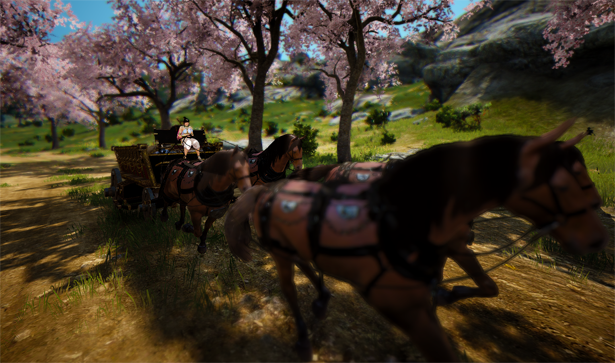
Mount Trade
This refers to doing trade by loading the goods on a mount such as donkey, horse, wagon, boat, or camel. Generally, a wagon is used because of the abundant storage space, but the donkey is also a decent choice for low level players. Nevertheless, it is better to purchase a wagon if you can afford it.
Transport Trade
This refers to trading crate type items through transportation. All the trade boxes that are crafted (contribution point investment) in a player’s residence can be transported, so they are usually crafted from a distant location and sold to earn the distance bonus. It’s also a process that can be carried out on the world map, making it a good side work to do.
First Step to Becoming a Wealthy Merchant
To start trading, you must get a mount. However, it is difficult in the early stages of the game to have enough money to purchase a mount. Fortunately, players can acquire a mount as a reward for completing the Velia quests. There are three types of quests with a mount reward, but since one of them is a life skill quest, so we’ll talk about the other two quests.
Donkey Reward Quest
If you complete all of the quests from the Black Spirit to defeat all the goblins, you will receive the quest [Big Fish in a Small Pond]. The reward for this quest is a donkey emblem. If you register the emblem at the stable, you can acquire the mount right away. The donkey has 5 inventory slots.
Flimsy Wagon Reward Quest
You can acquire the Flimsy Wagon by completing all the quests related to [Preparation for Trading] quest. This is like a tutorial-like quest for Trading. The quests are a little more bothersome since it has many states, but it’s bit better than using a donkey.
The flimsy wagon has 6 inventory slots and is sold at the stable shop for 35k silver coins.
|
Quest Name |
Start NPC |
Notes |
|
Preparation for Trade |
Bahar |
Lv. 12 and above, more than 4 contribution points and 501 silver coins. Quest will only be visible if the ‘Crop Business’ quest from Ovidio Toscani has not been accepted or completed. |
|
Trade Activity |
Bahar |
Investing in the Loggia Farm node |
|
Secure the Trade Route |
Severo Loggia |
Meeting Tiny Nose, the node manager of the Imp Cave |
|
Road to the Western Guard Camp |
Tiny Nose |
Connecting the nodes to the Western Guard Camp |
|
Trading Begins |
Cliff |
Sell Velia Wine to Luke via trading |
|
How to Make Trade Items? |
Luke |
Go see Severo Loggia |
|
Understanding Production Nodes |
Severo Loggia |
Learn about Production Nodes from Severo Loggia |
|
Activating Production Nodes |
Severo Loggia |
Enable Loggia Farm Potato Production Node; |
|
Collecting Resources |
Severo Loggia |
See Ernill, the storage keeper of Velia |
|
Meet Bahar |
Ernill |
Give Potato to Bahar |
|
Of course, a wagon is better because it can hold more trade items, but donkey also has its unique advantages. There is no chance of the trade item being damaged while it is being transported by a donkey. This means the player can go through those rough short cuts. The donkey is also slightly faster compared to a wagon. But there are disadvantages as well. Because it’s a living creature, you will have to continuously restore its stamina. But the wagon also needs to be fixed when it’s attacked by bandits, so they both need maintenance of some sort.
▲ Donkey is not bad at early stage
If you’re just starting off trade and wondering about the trade method, it would be better to choose the donkey. Starting traders only have a stock of 10 items anyway, so you’ll have to travel twice whether you use a donkey or a wagon. Thus, it is actually more efficient in this case to use the donkey, which is a bit faster.
If you can afford it, it is recommended that you buy a Strong Black Donkey (50k silver, 8 slots), and then a Farm Wagon (180k silver, 14 slots) from the stable shop in this order. |
||||||||||||||||
|
Currently, the best wagon for trades the wonderful Noble Wagon with 20 inventory slots. However, it’s priced over 2,000k silver under the recent marketplace prices, so it can be quite difficult for a beginner to buy this item. If you want to craft a Noble Wagon by getting the materials yourself, then it is advised that you have enough contribution points to do so. It’s because the stage 3 Wagon Workshop that is required to craft the Noble Wagon is located in Calpheon, and it is easier to send a worker to gather the materials rather than doing it yourself. In other words, you will need a lot of contribution points.
▲ The stage 3 Wagon Workshop requires 14 Contribution Points
Some materials require the ‘Processing - Beginner’ knowledge. This can acquired only by reaching a certain level in processing, and then carrying out a promotion quest. For example, the materials that require this kind of knowledge include Brass Ingot, Sturdy Pine Plywood and Fine Soft Hide, which are required to craft the Noble Wagon. However, don’t be stressed since it is rather easy to obtain the required processing level, and the promotion quest is quite easy as well. Wagons are consumables, so you will need a new one when the durability wears out in order to continue trading. So it is better to craft more than once wagon for the future. Of course, selling the ones you don’t need at the Marketplace is also a good idea.
|
||||||||||||||||

Trade Quests
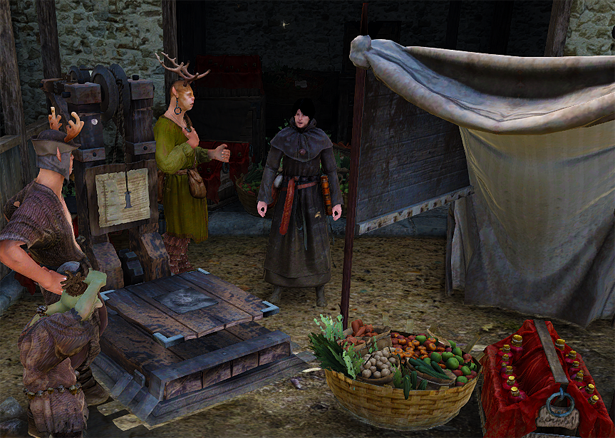
Trade quests come in the form of the trader asking you to sell some of their trade items and can be largely classified into 2 categories. The first is to sell a specific trade item, and then talking to a trade NPC of another region, and the second is to earn over a set amount of profit by selling their trade item.
The former type will only send you to where the nodes are connected, so you should disconnect the nodes for the unnecessary locations if you want to finish the trade quest quickly. For example, if you want to do trade within Balenos and Serendia only when your nodes are connected to Mediah, there can be cases where the quest will ask you to travel all the way to Mediah.
Thus, if you have decided on the trade route you want to follow, it is best to temporarily disconnect the nodes that are not within that trade route. The latter type of quest on appears when a player cannot carry out any more of the former type of quests and has a slightly better reward.
The quest reward can be separated into 3 levels, depending on the distance traveled.
First, traveling to a location within the same territory has the lowest reward, and traveling to a nearby territory has a better reward. Lastly, traveling to a distant territory that is that your neighbor provides the best reward.
The trade quest rewards always include contribution points, and depending on the level of the reward, you can also obtain Trade Item Exchange Tickets, various Currencies.
Since contribution points are additionally consumed whenever you expand your trade route, so it is advised to carry on the trade quests if you wish to specialize in trade.
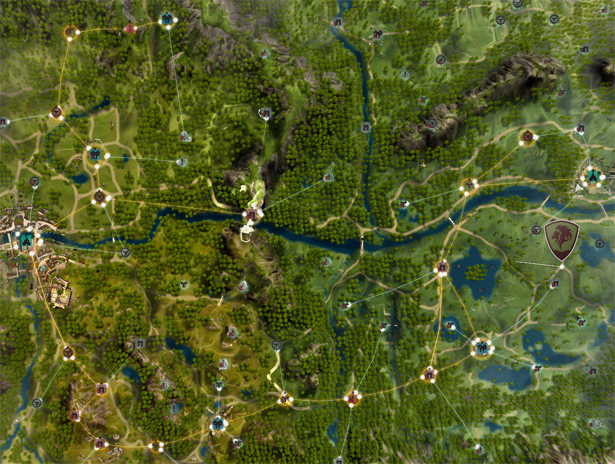
Trade Routes
In order to efficiently carry out trade, it is best to repeatedly go back and forth between a set route.
If you’re also carrying out trade quests as well, it is especially advisable that you separate the trade route from all other routes. This is because you can get the next trade quest when you finish one.
For trading between a small trade nodes, it is best to determine the route according to the inventory space of the transportation as you can only purchase up to 10 trade items. If you’re starting with a mount of 5 ~ 6 inventory slots, then it’s best to set an approximately 30 minute route to go back and forth twice every hour. If you have a mount with more than 10 inventory space, it’s better to set an approximately 1 hour route.
There is another advantage to having specific trade routes. You can purchase most of the trade items at the lowest price and sell it for the highest return. This is because of the system of how the market price shifts. If the market price graph has shifted through either purchase or sale, then it will slowly reach the maximum or minimum point, and then return to the fixed price if there aren’t any dealings within a set period of time. If you continue trading following a set route, you will be able to purchase or sell trade items before the price returns to the fixed price, allowing you to maintain the high/low market price.
However, note that each trade item has a different duration before the market price is returned to the fixed price. The expensive trade items have a tendency to return more quickly. Remember that this is also applicable to trade items with low trade amount.
If you do not have your own set trade route yet, take a look at the recommended route below.
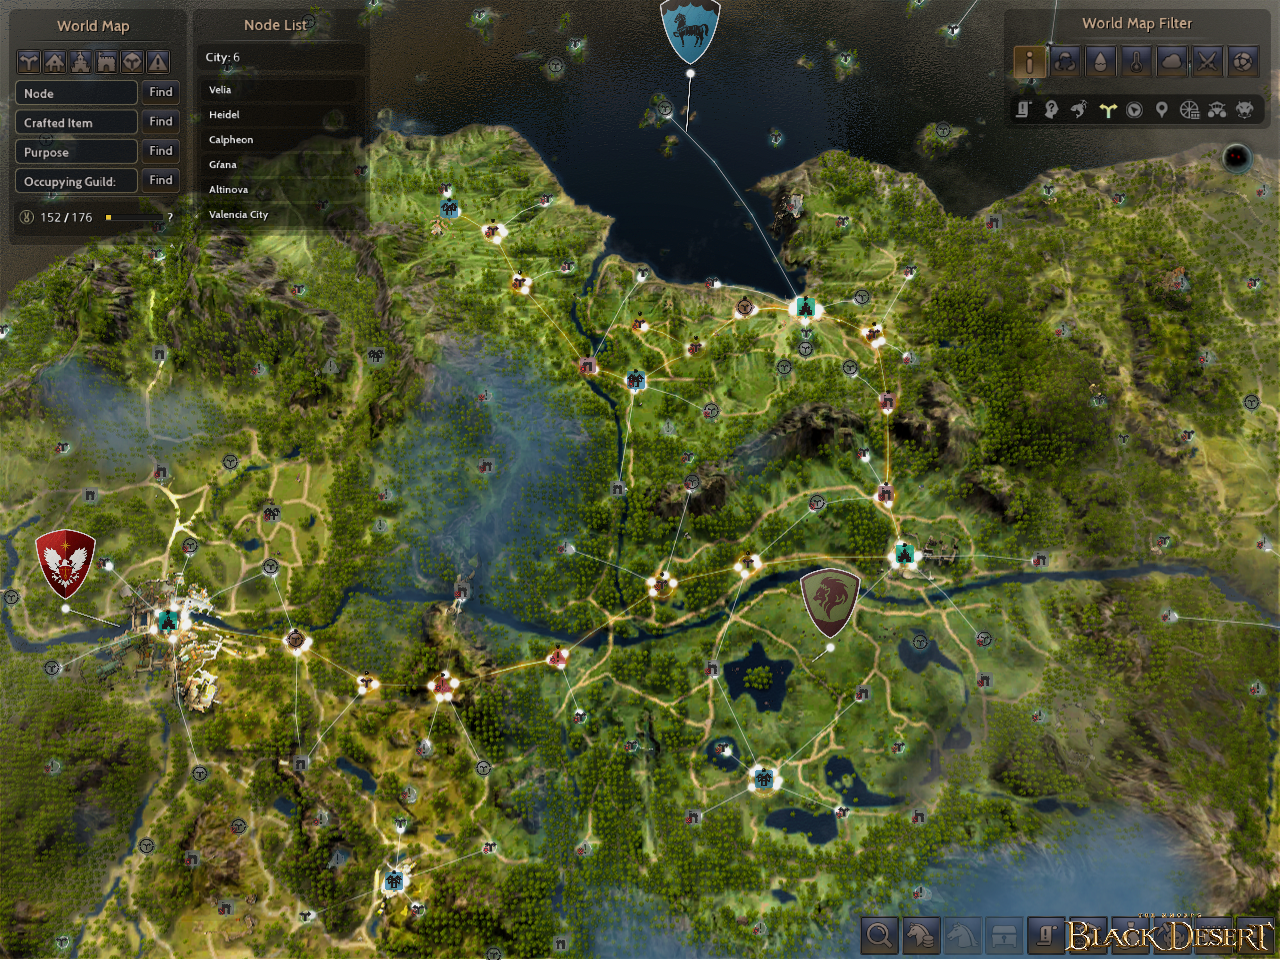
▲ If you want to carry out trade quests as well, it is best to temporarily withdraw your investment into nodes that are outside the route
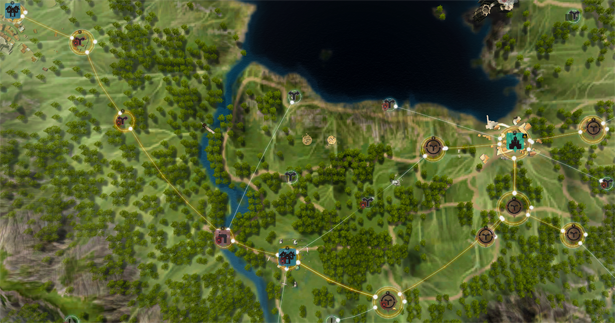
Balenos Routes
Velia - Finto Farm - Velia - Balenos Forest - Bartali Farm - Marino Farm - Toscani Farm - Western Guard Camp - Olvia - Western Guard Camp - Loggia Farm - Velia
This route goes to all the trade nodes of the inland Balenos. The route may look quite long at first glance, but it only takes 30 minutes on auto-move with a wagon with 100 movement speed. This route is recommended to players that have just set foot into the world of trading and are using a donkey or a flimsy wagon. Don’t forget to carry out trade quests as you’re going around the trade route. You will need the contribution points in order to invest in the trade nodes of Serendia, which is your next destination.
One tip for purchasing trade items is to purchase a good mix of expensive trade items. This is, of course, to maintain a good market value for all the items. For example, if a trade node has 4 in stock of one item and 6 in stock for the other, it’s best to buy 2 of the 4 in stock and 3 of the 6 in stock.
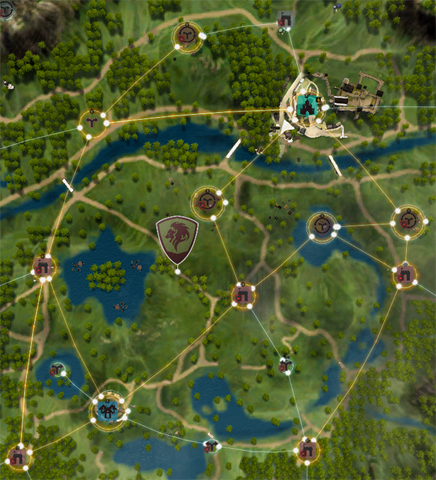
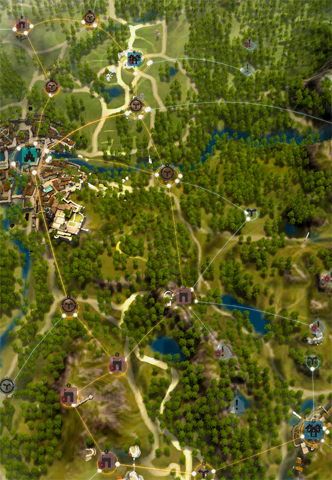
Serendia Route
Heidel - Alejandro Farm - Northwest Gateway - Glish - Southwestern Gateway - Glish - Southern Guard Camp - Eastern Gateway - Moretti Plantation - Northern Cienaga - Central Guard Camp - Costa Farm - Heidel
It is best to move on to Serendia after reaching trade Lv. 20.
If you haven’t upgraded your mount yet, then you should only trade around the Serendia route. However, if you’re on a mount with more than 10 inventory space, you should connect Heidel with Velia from the Balenos route.
This is because it only takes around 30 minutes on auto-move to complete the round trip across Serendia, but it takes at least 1 hour for the trade item stocks to reset. Thus, you will need to expand your travel route.
If you have connected the Balenos and Serendia routes, then always remember to check the current Imperial Delivery information and don’t miss out on the opportunity to deliver trade items between Velia and Heidel. You will earn a profit like nothing you’ve experienced until now.
Serendia – Calpheon City Route
Heidel - Glish - Keplan - Calpheon East Gate - Calpheon North Gate - Northern Wheat Plantation - Florin - Delphe Knights Castle – Heidel
This is a rapid trade route that takes less than 30 minutes that considered the abundance of trade item types and stock in major cities. This is a route for someone above trade Lv. 40. You should definitely mainly go for the expensive trade items, but make sure you take a good mix of goods. There are Imperial Deliveries available including Heidel and Glish for the Serendia region, as well as Calpheon, Keplan and Florin for the Calpheon region, so you should modify the route accordingly if these opportunities are available.
Costal Cliff Route
Velia - Olvia - Florin - Epheria
It is a route that runs along the breezy seaside with immaculate views along the way. You can use ride on fast horses in this route. This route allows you to complete the trade quests between Balenos and Calpheon regions.
This route is suitable for players above trade Lv. 35 and is great when you want to accumulate contribution points. Any of the nodes are fine, as long as it’s between the Balenos and Calpheon regions, but it’s recommended that you use small nodes and disconnect all the other nodes for efficiency.
Eastern Calpheon Route
Calpheon South Gate - Oberen Farm - Beacon Entrance Post - Trina Fort - Keplan - Marni Cave Path - Falres Dirt Farm - Dias Dirt Farm - Northern Wheat Plantation - Bernianto Farm - Anti-Troll Fortification - Contaminated Farm - Calpheon North Gate - Calpheon East Gate
Players can earn a great amount of trade EXP using this route as it has lots of trade items available. The route takes around 30 minutes on auto-move and is recommended for trade Lv. 40 and above. You will have a lot of extra time if you use only this route, so it is recommended that you combine it with the Imperial Delivery of the Serendia region or the Serendia Route.
But in these cases, modify to route so that the trip is a little bit easier.
Southern Calpheon Route
Calpheon South Gate - Oberen Farm - Bain Farmland - Phoniel’s Cabin - Behr - Crio - Longleaf Tree Sentry Post - Trent - Tobare’s Cabin - Mansha Forest - Rhutum Sentry Post - South Kaia Ferry - North Kaia Ferry - Gabino Farm - Calpheon South Gate
Trade route traveling across the southwestern region of Calpheon takes slightly over 30 minutes on auto-move. Although the routes are mostly linear, the roads are rough, and the contribution points for investing in these nodes are quite costly. So this route is not highly recommended unless you’re carrying out trade quests in this area.
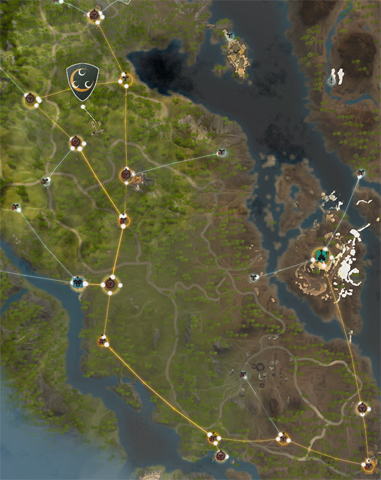
Mediah Route
Altinova - Abun - Splashing Point - Kasula Farm - Tarif - Stonetail Horse Ranch - Shuri Farm - Kusha - Omar Lava Cave - Altinova
This route is best for travel masters who seek to trade the high level trade items.
Although it’s more efficient than Calpheon route, but it’s better focus on Imperial Delivery rather than normal trade.
Mediah - Calpheon Imperial Delivery Route
You need to set various trade routes depending on the trade item that you can deliver.
The trade items in Balenos have low unit price, so should be avoided it if possible. Try doing round trips between Mediah and Calpheon, while dropping by nearby nodes as well as Heidel or Glish. The most efficient route is when you make a delivery between Mediah - Serendia - Calpheon regions. If this opportunity comes, you might have to save some money in the storage in a single round trip.
|
You can receive the most amount of trade EXP when you sell the trade items you purchased from the traders. On the contrary, the fishes and craft crates give very little trade EXP in comparison. Trade EXP increases with the distance traveled, so it would be good for you to create a major city route where you can purchase a large amount of trade items. In the beginning, try Velia – Heidel route and maybe Olvia and Glish. After that, the route centered on Calpheon - Keplan - Epheria will be the most efficient. On later stages, do Imperial Delivery and try to earn both silver and EXP. |
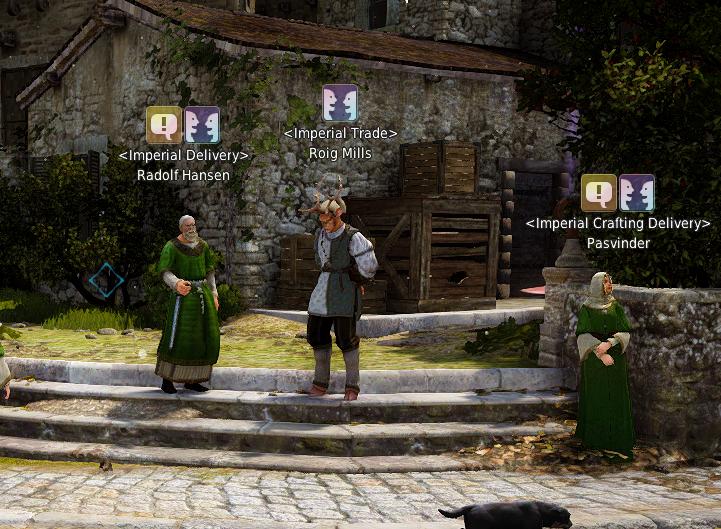
Imperial Delivery
Imperial Delivery is when you supply the items that are needed by the imperial family. The difference with a normal trade would be that there is a limited number of trade items that are accepted. Since the items are being purchased by the imperial family, the market value is fixed at 250%. The distance bonus and bargain game bonus will be applied on top of this, meaning that you can earn enormous profits.
Imperial Delivery can be done through the Imperial Delivery NPCs that are only located in the major cities of each territory (Velia, Heidel, Calpheon, Altinova, Valencia). Trading to Valencia will require you to cross the desert, so let’s forget about that for now.
Each of the Imperial Delivery NPCs will always ask for a trade item that is not from its own territory, but from another territory. So if you find a good route, you can earn a great profit.
The best route is either the Calpheon - Heidel - Altinova - Calpheon or the Calpheon - Altinova - Heidel – Calpheon. You can continuously supply the trade item until it resets since there is a sufficient amount that can be supplied.
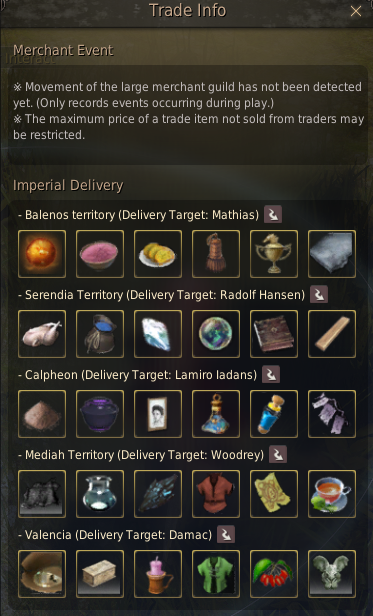
▲ You can view information on Imperial Delivery and events through trade information of ESC menu
In order to carry out the Imperial Delivery of Mediah, you need to be in master level for trade.
However, don’t be too intimidated by this since it doesn’t take that long to level up through normal trades.
Also, the trade item list and the quantity for Imperial Delivery is reset every 3 hours, so trade items that appeared before can again. The Imperial Delivery list is different for each channel, so you can move to another channel if you don’t like the current list. However, note that you will not be able to talk to the NPC for 10 minutes if you move to another channel.
You might get when you do an Imperial Delivery.
The items that can be exchanged with these seals are listed below.
|
Shiny Golden Seal - [Imperial Delivery] Exchange Item |
|||
|
Exchange x250 |
High-Quality Merchant Wagon Cover |
Exchange x250 |
Ancient Kamel Statue |
|
Exchange x300 |
Feather Champron of Storm |
Exchange x300 |
Black Essence – Hystria |
|
Exchange x320 |
Steel Horseshoe of Fighting Spirit |
Exchange x400 |
Fine Horse Trainer Clothes |
The Imperial Delivery for each territory are as listed as below.
Balenos
|
Delivery Territory |
Item Name |
Purchase Node |
Original Price |
Stock |
Delivery Volume |
|
Balenos |
Velian Smoked Chicken |
Velia |
2,855 |
10 |
405 ~ 540 |
|
Alchemist's Blue Reagent |
Velia |
4,914 |
6 |
285 ~ 342 |
|
|
Velian Crystal Glass |
Velia |
12,509 |
5 |
159 ~ 191 |
|
|
Velian Black Opal |
Velia |
9,540 |
4 |
112 ~ 135 |
|
|
Bartali's Odd Adventure |
Velia |
3,124 |
8 |
442 ~ 531 |
|
|
Velian Plank |
Velia |
11,473 |
10 |
162 ~ 195 |
|
|
Calpheon |
Imp’s Red Ore |
Western Guard Camp |
4,561 |
24 |
369 ~ 443 |
|
Imp Totem Fragment |
Western Guard Camp |
4,895 |
7 |
344 ~ 413 |
|
|
Tree Spirit Seed |
Western Guard Camp |
7,784 |
4 |
213 ~ 256 |
|
|
Ogre Excrement |
Western Guard Camp |
5,170 |
5 |
282 ~ 339 |
|
|
Special Balenos Herb |
Loggia Farm |
6,331 |
4 |
257 ~ 309 |
|
|
Red Parasitic Bee Honey |
Finto Farm |
8,546 |
4 |
229 ~ 275 |
|
|
Mediah |
Weasel Scarf |
Bartali Farm |
4,628 |
4 |
270 ~ 324 |
|
Bear Hide Cape |
Balenos Forest |
4,494 |
4 |
283 ~ 340 |
|
|
Love Potion No.6 |
Olvia |
13,254 |
4 |
144 ~ 173 |
|
|
Olvia Mountain Cheese |
Olvia |
11,067 |
5 |
162 ~ 195 |
|
|
Emergency Medicine Set |
Olvia |
4,138 |
7 |
282 ~ 339 |
|
|
Shaia Traditional Hat |
Olvia |
4,284 |
5 |
368 ~ 442 |
Serendia
|
Delivery Territory |
Item Name |
Purchase Node |
Original Price |
Stock |
Delivery Volume |
|
Balenos |
Heidel Knights Martial Arts Manual |
Heidel |
4,163 |
11 |
372 ~ 447 |
|
Madame Pillaf's Ribbon Set |
Heidel |
8,275 |
6 |
202 ~ 243 |
|
|
275 Year-Old Porodonio Wine |
Heidel |
13,129 |
5 |
143 ~ 172 |
|
|
Heidel First Aid Kit |
Heidel |
4,281 |
9 |
367 ~ 441 |
|
|
Wishing Kite |
Heidel |
2,564 |
30 |
586 ~ 704 |
|
|
Pumpkin Lamp |
Northern Cienaga |
11,476 |
4 |
162 ~ 195 |
|
|
Calpheon |
Cutting-Edge Dwarf Tool Pack |
Heidel |
7,518 |
7 |
184 ~ 221 |
|
Dragon Statue of Oyun |
Heidel |
15,283 |
5 |
125 ~ 150 |
|
|
Pure Iron Ore |
Heidel |
8,547 |
12 |
187 ~ 225 |
|
|
Heidel Cocktail Dress |
Heidel |
16,552 |
4 |
122 ~ 147 |
|
|
Alejandro’s Royal Jelly |
Alejandro Farm |
10,420 |
4 |
109 ~ 131 |
|
|
Moretti Flax Fabric |
Moretti Plantation |
9,027 |
4 |
167 ~ 201 |
|
|
Mediah |
Glish Mud Brick |
Glish |
6,592 |
14 |
229 ~ 275 |
|
Magic Binding Oak Branch |
Glish |
10,594 |
4 |
144 ~ 173 |
|
|
Fogan Skin Oil |
Glish |
7,513 |
5 |
184 ~ 221 |
|
|
Dried Fogan Hind Leg |
Glish |
6,037 |
10 |
229 ~ 275 |
|
|
Freharau’s Restorative |
Glish |
8,546 |
5 |
177 ~ 213 |
|
|
Bush Spider Poison Sack |
Southwestern Gateway |
11,562 |
4 |
151 ~ 182 |
Calpheon
|
Delivery Territory |
Item Name |
Purchase Node |
Original Price |
Stock |
Delivery Volume |
|
Balenos |
Stimi Chandelier |
Calpheon Market Street |
10,640 |
4 |
109 ~ 131 |
|
Aurobyl Fabric |
Calpheon Market Street |
3,129 |
18 |
176 ~ 212 |
|
|
Pallet Moving Se |
Calpheon Market Street |
3,796 |
7 |
160 ~ 192 |
|
|
Packaged Pig Barbeque |
Calpheon Market Street |
3,358 |
10 |
170 ~ 204 |
|
|
Cannon Mold |
Calpheon Market Street |
5,760 |
5 |
133 ~ 160 |
|
|
Calpheon Workshop Steel Ingot |
Calpheon Market Street |
4,770 |
10 |
143 ~ 172 |
|
|
Calpheon |
Epheria Fish Harpoon |
Epheria Port |
4,337 |
5 |
150 ~ 180 |
|
Silver Fish Skin |
Epheria Port |
4,881 |
5 |
142 ~ 171 |
|
|
Pearl Necklace |
Epheria Port |
11,102 |
4 |
108 ~ 130 |
|
|
Epheria Floating Bomb |
Epheria Port |
4,000 |
7 |
155 ~ 186 |
|
|
Epheria Fish Oil |
Epheria Port |
3,245 |
18 |
173 ~ 208 |
|
|
Fish Sausage |
Epheria Port |
3,665 |
10 |
162 ~ 195 |
|
|
Mediah |
Black Leopard Shard |
Keplan |
7,142 |
4 |
123 ~ 148 |
|
Ominous Black Mercury |
Keplan |
3,579 |
11 |
164 ~ 197 |
|
|
Ominous Black Ore |
Keplan |
5,321 |
10 |
137 ~ 165 |
|
|
Miner's Work Uniform |
Keplan |
4,014 |
8 |
155 ~ 186 |
|
|
Anti-Petrifying Amulet |
Keplan |
4,343 |
6 |
150 ~ 180 |
|
|
Keplan Ginger Tea |
Keplan |
5,230 |
5 |
138 ~ 166 |
|
|
Valencia |
Valentine Salve |
Florin |
3,118 |
15 |
177 ~ 213 |
|
Caphras Steamer |
Florin |
3,559 |
8 |
165 ~ 198 |
|
|
Florin Scented Candle |
Florin |
10,632 |
4 |
109 ~ 131 |
|
|
Nymph Costume Set |
Florin |
4,119 |
5 |
153 ~ 184 |
|
|
Dried Cornelian Cherry |
Florin |
3,567 |
6 |
165 ~ 198 |
|
|
Mossy Ancient Statue |
Bernianto Farm |
9,782 |
4 |
111 ~ 134 |
Mediah
|
Delivery Territory |
Item Name |
Purchase Node |
Original Price |
Stock |
Delivery Volume |
|
Balenos |
Lava Spider's Flame Sac |
Omar Lava Cave |
5,329 |
4 |
137 ~ 165 |
|
Shuri Farm Sweet Potato Starch |
Shuri Farm |
4,113 |
6 |
153 ~ 184 |
|
|
Stonetail Hills Garlic Bread |
Stonetail Hill Horse Ranch |
4,880 |
7 |
142 ~ 171 |
|
|
Horsehair Brush |
Stonetail Hill Horse Ranch |
5,779 |
5 |
132 ~ 159 |
|
|
Horse Race Trophy |
Stonetail Hill Horse Ranch |
11,062 |
4 |
108 ~ 130 |
|
|
Rhino Stone Hide |
Stonetail Hill Horse Ranch |
4,769 |
24 |
143 ~ 172 |
|
|
Calpheon |
Eastern Culture |
Altinova |
3,246 |
27 |
173 ~ 208 |
|
Shabby Sculpture |
Altinova |
11,062 |
4 |
108 ~ 130 |
|
|
Jeweled Dagger |
Altinova |
9,536 |
5 |
112 ~ 135 |
|
|
Mariam's Sandwich |
Altinova |
5,544 |
5 |
135 ~ 162 |
|
|
Blue Silk Fabric |
Altinova |
3,355 |
14 |
170 ~ 204 |
|
|
Barbarian's Oval Shield |
Altinova |
5,003 |
6 |
140 ~ 168 |
|
|
Mediah |
Kasula Cinnamon Powder |
Kasula Farm |
3,448 |
6 |
168 ~ 202 |
|
Pot with Black Spirit |
Tarif |
5,425 |
5 |
136 ~ 164 |
|
|
Soul-Bearing Portrait |
Tarif |
10,654 |
4 |
109 ~ 131 |
|
|
Supernatural Elixir |
Tarif |
4,102 |
8 |
154 ~ 185 |
|
|
Healing Potion |
Tarif |
3,684 |
15 |
162 ~ 195 |
|
|
Kirus' Talisman |
Tarif |
4,788 |
6 |
143 ~ 172 |
|
|
Valencia |
Mediah Medical Supply |
Mediah Northern Gateway |
6,107 |
4 |
130 ~ 156 |
|
Mediah Straggler's Bent Sword |
Mediah Northern Gateway |
4,211 |
6 |
152 ~ 183 |
|
|
Ball of Cobweb |
Kusha |
11,110 |
4 |
108 ~ 130 |
|
|
Kushan Smoked Beef |
Kusha |
3,669 |
12 |
162 ~ 195 |
|
|
Spider Anesthetic |
Kusha |
4,121 |
7 |
153 ~ 184 |
|
|
Warm Blanket |
Kusha |
5,877 |
5 |
132 ~ 159 |
Imperial Crafting / Fishing Delivery
Imperial Crafting Delivery involves packaging a specific item and supplying it to the imperial family. It is different from Imperial Delivery since it process a food or alchemy product that can’t be traded into a form that can be traded.
This means that you’ll be crafting a trade item and delivering it rather than buying it from an trader. It requires a lot of preparation and effort, but you can earn a large amount of money this way.
The Imperial Crafting Delivery is randomly reset every 3 hours. Along with the reset, the remaining amount and the market place gets reset as well. The market price starts from 200% and increases up to 250% as the remaining volume decreases. The distance bonus and bargain game bonus does not get applied since the unit price is high.
You can learn more about Imperial cooking and alchemy through Help ( ESC menu – ‘Help’).
Go to ‘My cooking and alchemy’ to learn the details on gathering ingredients and crafting methods.
The Imperial Fishing Delivery has the same system as the Imperial Crafting Delivery. The only difference is that you deliver the fish that you catch.
|
Imperial Crafting Delivery NPC for each Territory |
||
|
Balenos |
Velia Imperial Fishing Karon |
Olvia Imperial Crafting Delivery Lotz Pavarotti |
|
Serendia |
Glish Imperial Fishing Rai |
Heidel Imperial Crafting Delivery Pasvinder |
|
Calpheon |
Epheria Imperial Fishing Dius |
Calpheon Imperial Crafting Delivery Bech |
|
Mediah |
Splashing Point Imperial Fishing Hirio |
Altinova Imperial Crafting Delivery Liff |
|
Valencia |
Valencia Imperial Fishing Hanmadu |
Valencia Imperial Crafting Delivery Shandi Yut |
Trading processed items
This refers to selling various types of creates that can be earned through Craft House.
The advantages are that the ingredients can be gathered by your workers and the crate items can be stacked in the storage. You can also set the origin of the item quite freely and earn big money through trade by using the fact that delivery is available.
You can have unlimited workforce by giving beer to the workers. This is an efficient method that a lot of adventurers use.
Trading processed items is a simple process. You just need to craft crates from the various workbenches (wood, mineral, crop, mushroom, fish) and sell them.
The most important thing here is town that workers is affiliated with. This is because the origin of the item will not be determined by the location of the workbench, but the village where the worker is from.
The materials also need to be within the storage of the town that the worker is part of, as the system involves the worker taking the materials from his/her own town to the workbench and crafting the item there. (The crafting duration, however, will be lower if the workbench is located in the town of the worker.)
The materials have to be in storage of the town where the worker is at. This is because the workers take the materials from his/her town to the workbench and crafts the item there (But it will take less crafting time if the workbench is located at where the worker is at).
For these reasons, you need to determine the origin of the crafted item and where it is going to be sold. Although Trent and Valencia are the two furthest locations, it is very inconvenient to transport a complete processed product between these two places. This is why the route between Epheria and Valencia is commonly used: it has a great distance bonus, and the transportation is fairly easy as well.
You can transport the goods from Epheria to the Ancado Inner Harbor located north of Valencia through ship transport. Then you need to move the goods from Ancado Inner Harbor to Valencia yourself. But if this is too much work, you can just sell it at the Ancado Inner Harbor. But remember that you won’t be able to receive the Desert Buff in this case.
Distance Bonus (%) between the major locations
|
Velia |
Olvia |
Heidel |
Glish |
Calpheon |
Keplan |
Epheria |
Trent |
Altinova |
Tarif |
Valencia |
Shakatu |
|
|
Velia |
|
10 |
7 |
13 |
19 |
18 |
24 |
33 |
26 |
17 |
69 |
41 |
|
Olvia |
10 |
|
16 |
18 |
14 |
18 |
15 |
29 |
37 |
28 |
79 |
50 |
|
Heidel |
7 |
16 |
|
6 |
19 |
14 |
26 |
31 |
22 |
13 |
69 |
42 |
|
Glish |
13 |
18 |
6 |
|
16 |
9 |
25 |
25 |
26 |
16 |
74 |
48 |
|
Calpheon |
19 |
14 |
19 |
16 |
|
9 |
9 |
14 |
41 |
32 |
88 |
60 |
|
Keplan |
18 |
18 |
14 |
9 |
9 |
|
18 |
16 |
35 |
26 |
83 |
57 |
|
Epheria |
24 |
15 |
26 |
25 |
9 |
18 |
|
18 |
49 |
40 |
94 |
65 |
|
Trent |
33 |
29 |
31 |
25 |
14 |
16 |
18 |
|
51 |
42 |
99 |
73 |
|
Altinova |
26 |
37 |
22 |
26 |
41 |
35 |
49 |
51 |
|
9 |
48 |
27 |
|
Tarif |
17 |
28 |
13 |
16 |
32 |
26 |
40 |
42 |
9 |
|
57 |
33 |
|
Valencia |
69 |
79 |
69 |
74 |
88 |
83 |
94 |
99 |
48 |
57 |
|
30 |
|
Shakatu |
41 |
50 |
42 |
48 |
60 |
57 |
65 |
73 |
27 |
33 |
30 |
|
If you decided on the origin and the location you want to sell it to, you need to decide what kind of crate you want to make. It wouldn’t be very efficient if you don’t grow the Crop Crates and Mushroom Crates yourself and sell it. It’s better to sell raw fish rather than packaging them into Fish Crate after drying, so that’s out of the question. You should decide between Timber Crate or the Mineral Crate. The recommended goods are as follows.
|
Recommended Timber Crate Goods |
||
|
Balenos Timber Crate |
19,740 Silver Coins |
5 Ash Plywood, 5 Maple Plywood, 1 Black Stone Powder |
|
Serendia Timber Crate |
22,860 Silver Coins |
5 Maple Plywood, 5 Pine Plywood, 1 Black Stone Powder |
|
Calpheon Timber Crate |
35,880 Silver Coins |
5 Birch Plywood, 5 Fir Plywood, 5 Cedar Plywood, 1 Black Stone Powder |
|
Mediah Timber Crate |
29,100 Silver Coins |
5 White Cedar Plywood, 5 Acacia Plywood, 1 Black Stone Powder |
|
Recommended Mineral Crate Goods |
||
|
Brass Ingot Crate |
20,520 Silver Coins |
10 Brass Ingot, 1 Black Stone Powder |
|
Bronze Ingot Crate |
22,080 Silver Coins |
10 Bronze Ingot, 1 Black Stone Powder |
|
Steel Ingot Crate |
25,200 Silver Coins |
10 Steel Ingot, 1 Black Stone Powder |
|
Vanadium Ingot Crate |
43,110 Silver Coins |
10 Vanadium Ingot, 1 Black Stone Powder |
|
Titanium Ingot Crate |
46,950 Silver Coins |
10 Titanium Ingot, 1 Black Stone Powder |
※ Procedures for trading processed items
Select which crate to craft > Send workers to gather materials > Transport the materials to the storage of the town that you want to set as origin > Make crates with the origin workers > Transport the product to the town where it will be sold > Sell the item
Your efforts will never betray you
The Imperial Delivery became much more efficient because the trade items sold by the traders increased (As of June 2016).
It is old news that it is inefficient compared to other contents.
The Trade Level is very important in terms of how much profit you can earn through trade, so it is best to level up through normal trade, and then changing to Imperial Delivery and Processed Trade.
It takes a lot of time and effort to trade with the items you made because it takes a lot of time to gather the materials and to process it. So it’s difficult to say how much you can earn per hour, but the rewards will be satisfying.
Trade has developed with time, and it will develop in the future as well.
*The content of the game guide may differ from the actual game content, depending on the update and content changes.